Sportident released a new Red Split printer in 2019 and had an end of year special where it was bundled with 5 SIACs and their orienteering App.
The versatile little printer can be interfaced via USB, wirelessly by Bluetooth, or using a serial cable. For use with O-Lynx, the USB interface worked well, but I also wanted it was to act as a spare for our Sportident Printer set which is used a lot in the school programs my wife runs.
The official “Sportident Organisers Guide” should be your first place to go to for information as there are some differences between the Generic and Sportident branded printer e.g. the default Bluetooth password.
https://www.sportident.com/documents/organiser-guide/organiser-guide.pdf
The printer is also known as a ZJ-58 or ZJ-5805 for which instruction manuals and drivers may be found on the internet. E.g. http://www.zjiang.com/en/init.php/product/index?id=22
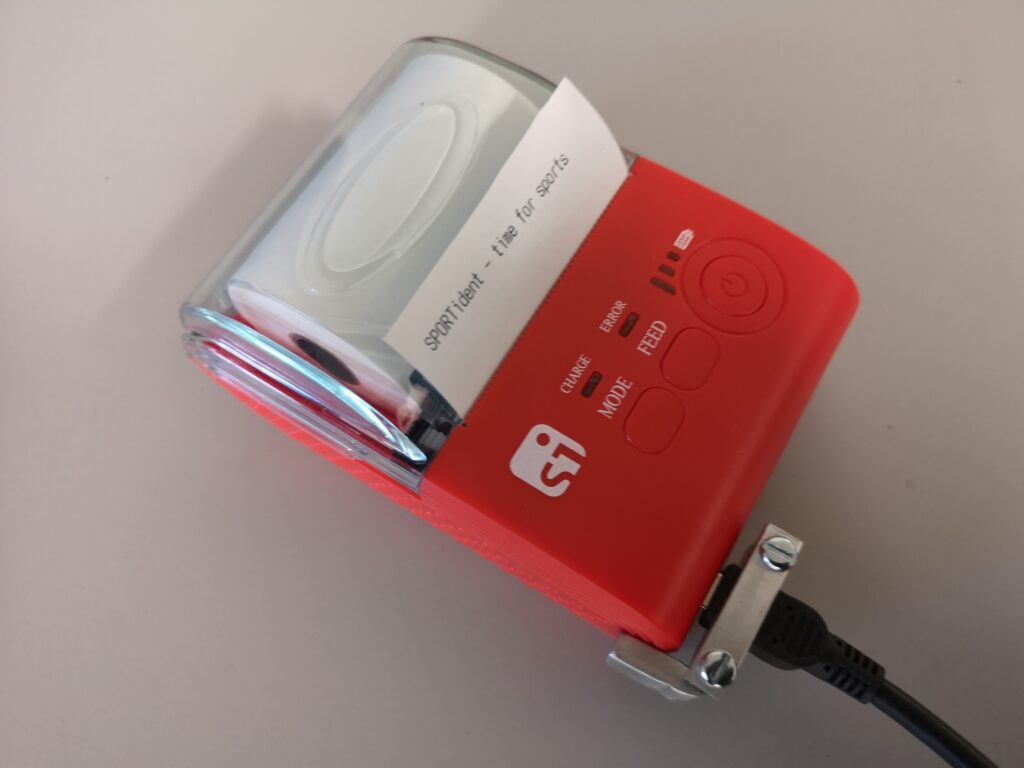
To use the SI Red printer with the Printout Station requires a special cable as the printer’s serial port connection is via a USB Mini type socket as per the labelled “COM(RS232) port” in this diagram.

Such a cable is available from Sportident but if like me you live on the other side of the world or like DIY, the cable is also easy to make.
Take an existing Mini USB cable and remove one end so you just have a cable with a single mini USB connector on one end. Strip the insulation off the cut end to expose the wires.
Use the following guide to connect these wires to a female 9 way D socket.
Cable Wire Colours 9 way Female D socket
Black not connected
Green pin 3
White pin 2
Red pin 5 (GND)
The finished cable should look similar to the picture below.
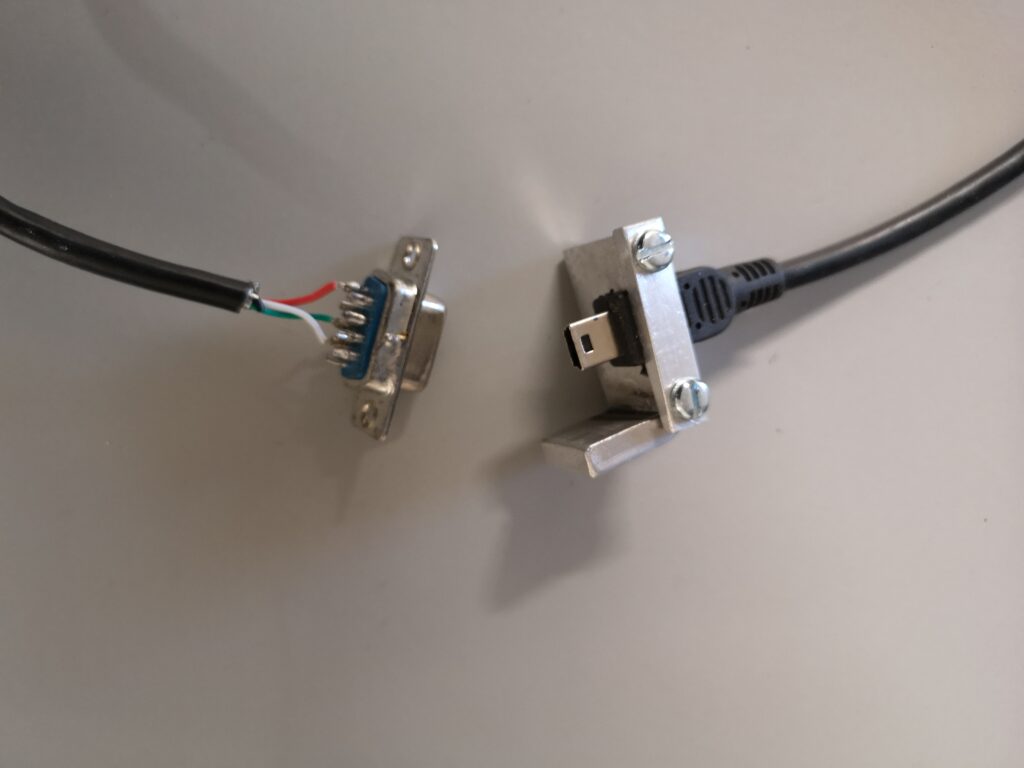
Note how a piece of right-angle aluminum was also clamped to the mini USB end of the cable. This makes it so the plug can only fit in the correct socket on the printer as unfortunately, both the USB and serial connections use the same type of mini USB connection. The printer, or device it is connected to, could be damaged if the wrong connection point was accidentally used, so do something similar or label the connections well.
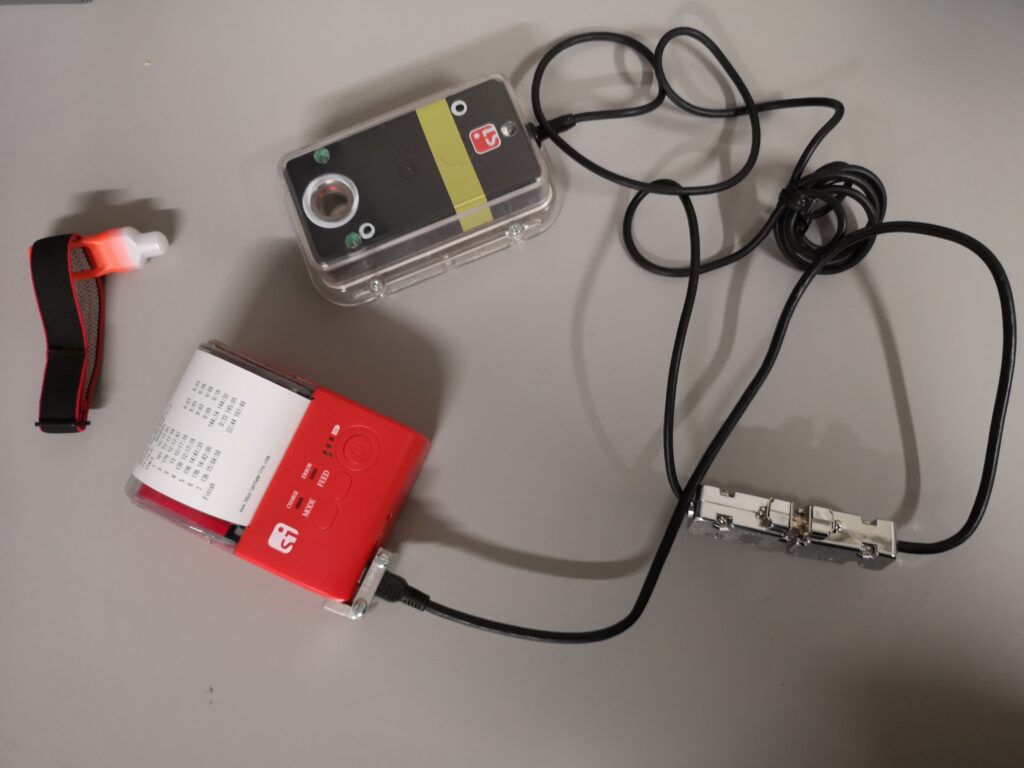
Once the cable is complete, the Printout station can be connected to the printer and a chip punched to test the printer operation.
The default printing template in the Printout station will not suit the Red printer initially as the font used will be too big to fit one punch record per line. Sportident have built in commands to fix this in Config+ as detailed in the Sportident Organisers Guide.
Note the first method ( programming the station direct from config+ ) did not work for me so I used the second method where Config+ modifies an existing layout file ( I used the layout “sample2_gede” installed with the “Sportident Print” program ). Then the “Sportident Print” program is used to load the layout to the printer.
In order to do this though, the Printout station must connect directly to a PC for loading the modified layout. A Serial to USB adapter cable needs to be used, along with a crossover/null modem type adapter cable as per the following photo.
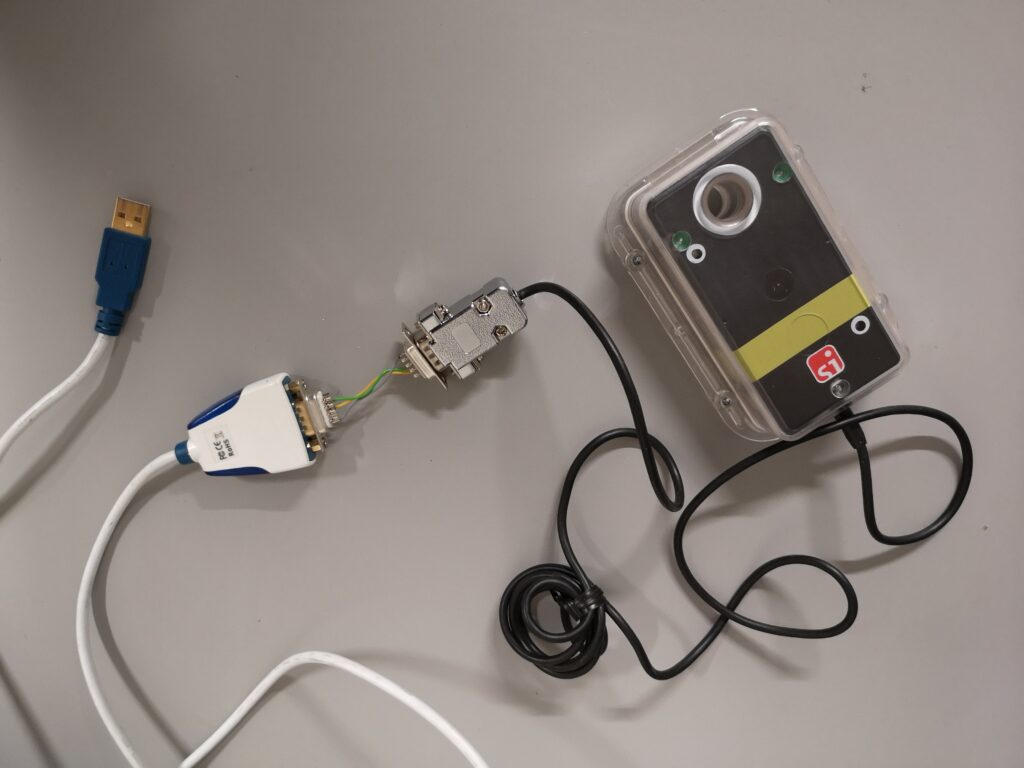
If you wish to make this adapter the pinout is below and simply crosses over the transmit and receive wires on pins 2 & 3.
9 way Female D socket 9 way Female D socket
Pin 2 Pin 3
Pin 3 Pin 2
Pin 5 ( GND ) Pin 5 ( GND )
Once the template file is modified and programmed the little Red printer is all ready to be thoroughly tested by hundreds of eager school children.